
 MY ACCOUNT
 CONTACT US
 THE ROLLING BEERS BLOG
 A PROJECT ?

I’m just getting started, where should I begin ?
Dive into the fascinating world of homebrewing ! Whether you're simply curious or already passionate about craft beer, this section is your gateway to a sparkling adventure.
I’m intermediate, what’s next ?
Welcome to the inner circle of passionate brewers. If you already know what dry hopping is or how to manage fermentation, it’s time to take things to the next level…
I’m going pro, I’m the boss now !
You’ve brewed, tasted, adjusted… now you’re ready to take the leap. This section is your launchpad into the exciting world of professional microbrewing !
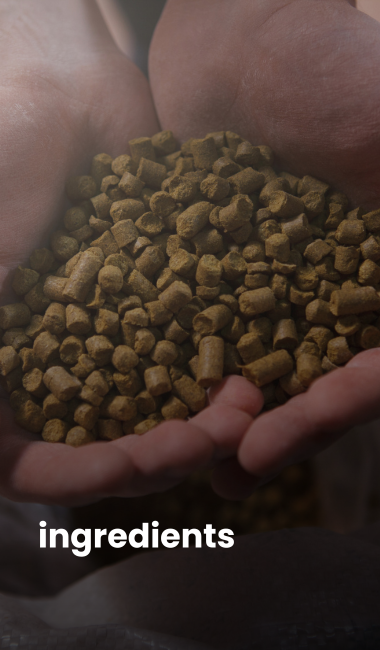
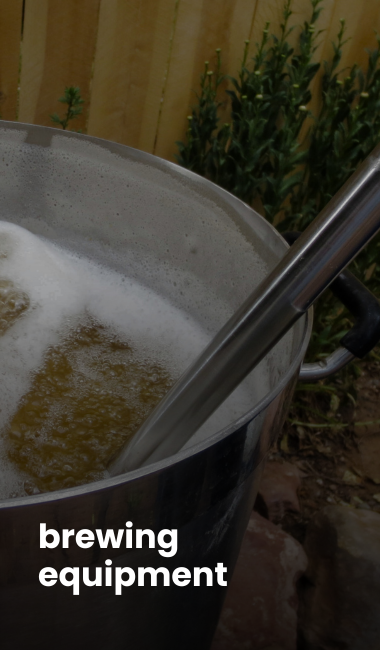
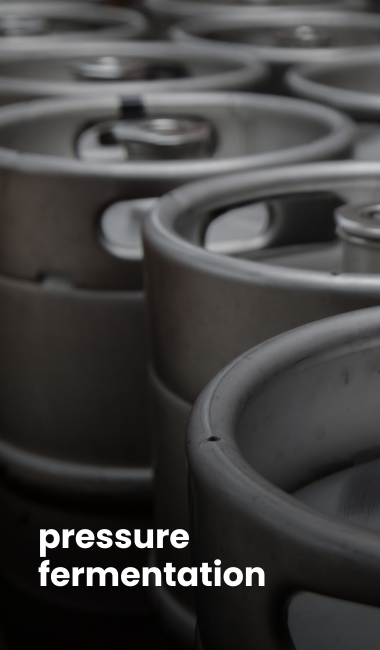
Discover the Best-Sellers in the homebrewing category


New arrivals at Rolling Beers


Not sure where to start ?
Let us show you the way !
Beginner level
The Basics of Brewing: From Water to Glass
Brewing your own beer is the perfect blend of technical precision and creativity. Before reaching for your first bottle opener, here are the fundamentals for transforming raw ingredients into a unique sensory experience.
The Essential Ingredients
- Malt : The soul of your beer. Made from barley, it provides the body, color, and sugars essential for fermentation.
- Hops : The brewer's spice. They define the bitterness, shape the aromas (citrus, pine, floral), and ensure natural preservation.
- Yeast : The worker in the shadows. It transforms sugar into alcohol and fine CO2 bubbles.
- Water : It makes up over 90% of your glass; its purity is the foundation of your recipe.
The 6 Key Steps of Brewing
- Mashing : Crushed malt is infused in hot water to extract all its sugary potential.
- Lautering / Filtering : The precious liquid (wort) is separated from the spent grains.
- Boiling : The wort is brought to a boil to sterilize it and incorporate the hops.
- Cooling : A critical step where the temperature is dropped quickly so the yeast can be added safely.
- Fermentation : The phase of patience. Over a few weeks, the yeast transforms the wort into beer.
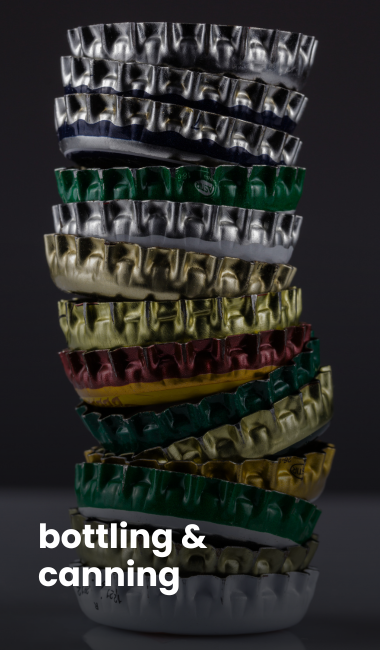
- Bottling : The packaging stage, followed by necessary resting for final carbonation.
READ THE BLOG POST
Rolling Beers Beginner Kits : Stress-Free Homebrewing
- India Pale Ale Beer Brewing Kit 8L
- French Blonde Ale Beer Brewing Kit 8L
- German Wheat Beer Brewing Kit 8L
Dreaming of crafting your own beer but hesitating to take the plunge ? Rolling Beers beginner kits turn that desire into reality. This isn’t just a kit - it's an immersive experience that guides you step by step, from the first boil to your very first shared toast.
Why choose Rolling Beers kits ?
- Turnkey solution : Fresh ingredients, essential equipment, and an ultra-pedagogical manual: everything is in the box.
- Style diversity : IPA, Blonde, Wheat or Stout... explore the craft aroma palette.
- Zero technical barriers : No need to be an engineer, your enthusiasm is enough to succeed on your first brew.
- Guaranteed success : Calibrated and tested recipes for a delicious and rewarding result right from the first bottle.
In short : These kits are the ideal entry point to get into brewing without feeling overwhelmed. You'll get several liters of craft beer to proudly enjoy (or share... if you're feeling generous !).
DISCOVER THE BEGINNER KITS
Why choose a equipment pack over buying items individually ?
A smart and economical choice
- Better price : Packs are often discounted compared to buying each item separately.
- Avoid forgetting items : Everything is included, so you don't have to worry about what you might be missing to get started.
- Sustainable investment : The equipment is reusable for many batches, making it a quick return on investment.
Complete and consistent equipment
- Brewing (kettles, spoons, thermometers...)
- Fermentation (fermenters, airlocks...)
- Bottling (capper, caps, brush...)
- Quality control (hydrometer, test jar...)
Every item is selected to work together, avoiding the common incompatibilities that occur when buying separately.
- Ideal for beginners
- Designed for learning and success
- The packs are designed to guide novices through every stage of brewing : from malt infusion to bottling.
They allow you to brew like a pro, while remaining accessible and easy to use.
- Progressive learning
- The provided equipment is compatible with beer kits (malt extract) but also with all-grain kits, allowing you to evolve toward more technical brews.
- Tutorials and guides are available to support every step.
A perfect gift idea
Giving an equipment pack means giving a complete and fun experience. Perfect for beer lovers who want to get into homebrewing without getting lost in technical details.
DISCOVER OUR EQUIPMENT PACKS
The art of clean brewing: the foundation of a successful beer
A good beer begins long before mashing: it is born in a clean, controlled, and rigorous environment. Hygiene is not a constraint — it is your best ally to avoid off‑flavors, protect your fermentations, and ensure consistency in your batches. Here are the essential principles for brewing with peace of mind, from equipment to bottling.
The 4 pillars of impeccable hygiene
- Clean before sanitizing : Cleaning removes visible residues (malt, proteins, yeast). Sanitizing eliminates invisible microorganisms. Without cleaning, sanitizing is ineffective.
- Use the right products at the right time : Alkaline cleaners dissolve sugars and organic deposits; acidic cleaners remove scale and mineral buildup; no‑rinse sanitizers are used before fermentation and bottling.
- Respect contact times : A product needs time to work. Too short = ineffective; too long = risk of corrosion or residue.
- Rinse smartly : After cleaning, a clear and abundant rinse prevents off‑flavors. After sanitizing, do not rinse if the product is “no‑rinse”.
Critical areas to monitor
- Fermenters : Gaskets, taps, lids… all are potential bacterial nests that must be cleaned and sanitized thoroughly.
- Tubing and transfers : Invisible but sensitive; clean immediately after use to avoid dried deposits that are difficult to remove.
- Bottling equipment : Capper, filling wands, bottles… every element must be spotless to avoid last‑minute contamination.
- Brew kettles : Watch out for wort scorching and protein deposits that can affect flavor if poorly cleaned.
Recommended cleaning routine
- After each brew : Full cleaning of kettles, filters, spoons, chillers with appropriate products, thorough rinsing, and air‑drying.
- Before fermentation : Sanitizing the fermenter, tubing, and airlock with minimal handling to reduce contamination risks.
- Before bottling : Sanitizing bottles, filling equipment, and caps in a clean and dry environment.
Mistakes to absolutely avoid
- Using sponges or abrasives : Scratches create areas where bacteria can hide and resist future cleaning.
- Leaving dirty equipment “for later” : Residues dry, harden, and become harder to remove, increasing contamination risks.
- Mixing acidic and alkaline products : This can neutralize their effectiveness and cause unwanted reactions on your equipment.
- Forgetting small parts : Gaskets, valves, fittings… often the main cause of recurring contamination.
READ THE BLOG ARTICLE.
The final step before tasting
Bottling is the moment when your beer comes to life one last time: this is where it gains its sparkle, its foam, and its final balance. A well‑managed refermentation ensures controlled carbonation and a beer that remains stable over time.
The basics of refermentation
- Priming sugar : It reactivates the yeast in the bottle. Precise dosing prevents flat beers or over‑carbonation.
- Active yeast : If fermentation is too old, the yeast may be tired. Good timing ensures effective carbonation.
- Homogeneous mixing : The sugar must be evenly distributed to avoid variations between bottles.
Essential bottling steps
- Sanitize the bottles : Impeccable hygiene prevents contamination.
- Add priming sugar : As syrup in the fermenter or directly into each bottle.
- Fill without oxygenating : Gentle filling preserves aromas and limits oxidation.
- Cap firmly : A proper seal ensures stable refermentation.
Mistakes to avoid
- Incorrect sugar dosage : Too little = flat beer; too much = risk of overpressure.
- Bottling too early : An unfinished fermentation can cause excessive carbonation.
- Ignoring conditioning temperature : Refermentation requires 18–22°C for 10 to 15 days.
Most problems have a solution
Every homebrewer experiences a batch that seems strange, cloudy, too bitter, or not fizzy enough. The good news? In most cases, it’s not a real failure, but a small common mistake that can be corrected easily.
Signs that worry you… but are normal
- Cloudy beer : Often due to proteins or yeast in suspension. It clears up over time.
- Sediment at the bottom of the bottle : Completely normal: it’s the refermentation yeast.
- “Young” taste : The beer simply needs a few more days of rest.
- Weak foam : Carbonation can take up to two weeks.
Real common mistakes
- Fermentation temperature too high : Can produce banana, solvent, or spicy aromas.
- Oxygenation after fermentation : Causes wet cardboard or cider-like flavors.
- Under‑dosing priming sugar : Flat or barely carbonated beer.
- Poor hygiene : Risk of sour, vinegary, or unwanted “funky” flavors.
How to fix a batch?
- Let it mature longer : Many flaws fade with time.
- Store it cool : Stabilizes aromas and improves clarity.
- Accept a different beer : Sometimes a “failed” batch becomes a unique… and delicious beer.
- Analyze to improve : Note temperatures, durations, and dosages to avoid repeating the same mistake.
Reached the intermediate level
What's next ?
Intermediate level
Two ways to approach all‑grain brewing
Switching to all‑grain means choosing to fully control your recipe: the choice of malts, mash steps, and efficiency. Two methods are particularly appreciated by homebrewers: BIAB, accessible and flexible, and the automatic brewing kettle, more comfortable and consistent. Each has its advantages depending on your brewing style.
BIAB: simple, economical, versatile
- A single vessel : One large kettle + a mesh bag, and you’re ready to brew.
- Less equipment : Ideal for small spaces or tight budgets.
- Intuitive process : Perfect for understanding the basics of all‑grain brewing.
- Limitations : Handling a hot bag, sometimes lower efficiency, less convenient sparging.
Automatic brewing kettle: comfort and precision
- Integrated stainless basket : Clean filtration and easy handling.
- Precise temperature control : Repeatable mash steps.
- Optimized sparging : Better efficiency and fewer losses.
- Limitations : Higher investment, bulkier equipment, requires a dedicated sparge kettle.
How to choose?
- Tight budget / desire for simplicity : BIAB is ideal.
- Looking for comfort / repeatability : The automatic kettle offers a real advantage.
- Small volumes : BIAB remains very practical.
- Regular 20–30 L batches : The automatic kettle becomes highly beneficial.
Why is controlling fermentation temperature essential ?
A key factor for beer quality. Fermentation is the heart of brewing : this is where yeast transforms sugars into alcohol and aromas.
Poor temperature control can lead to :
- Off-flavors (diacetyl, sulfur...)
- Incomplete or too rapid fermentation
- Stress for the yeast, reducing its efficiency
Stability = consistency
Every yeast has an optimal temperature range. By maintaining a stable temperature, you achieve :
- Clean and balanced aromas
- Reproducibility between batches
- Better control of the flavor profile
- Prevention of contamination.
- Well-controlled fermentation allows yeast to dominate the environment, preventing unwanted bacteria from taking hold.
Thermal control is therefore also a sanitary shield for your beer.
Process optimization
Real-world example: you pitch yeast at 20°C, but primary fermentation generates heat and rises to 24°C.
If the temperature drops too quickly, the yeast cannot finish its job → risk of gushing upon bottling.
By adjusting the temperature at the end of fermentation, you help the yeast finish cleanly.
Rolling Beers Solutions
- Ferminator Connect : compact and connected fermentation chamber
- InkBird Controllers : to control heating/cooling
- RAPT Chambers : for demanding brewers
This equipment allows you to brew all year round, even in summer or winter, with professional precision.
In short
Controlling fermentation temperature means :
- Guaranteeing a flaw-free beer
- Obtaining mastered aromas
- Ensuring an efficient and regular fermentation
- Protecting your brew from contamination
It is an essential investment for any brewer, beginner or experienced.
READ THE BLOG POST ON TEMPERATURE CONTROL
Brewing a beer means balancing four families of ingredients
Creating your own recipe means understanding how each ingredient influences flavor, color, body, and aroma. All‑grain brewing offers total freedom: it’s up to you to play with malts, hops, yeast, and water to build a coherent and balanced beer.
Malts: the foundation of your beer’s profile
- Base malts : Use 60 to 100%. They define body, pale‑to‑golden color, and provide most fermentable sugars.
- Specialty malts : Use 2 to 15%. They add roundness, biscuit, caramel, roasted or chocolate notes.
- Highly roasted malts : Use 1 to 5%. They give black color and intense aromas.
Hops: bitterness, aroma, personality
- Bittering hops : Added at the start of the boil to structure bitterness.
- Aromatic hops : Added at the end of the boil or in dry hop for aromas (citrus, tropical fruit, resin, flowers).
Yeast: the engine of character
- Ale yeasts : Fruity esters, warm fermentation, varied styles (IPA, Blonde, Stout…).
- Lager yeasts : Cold fermentation, clean and crisp profile.
Water: the invisible but essential ingredient
- Minerality : Influences bitterness perception, roundness, and dryness.
- Simple adjustments : Sulfates enhance bitterness; chlorides round out maltiness.
Flaked grains: texture, smoothness, foam stability
- Oat flakes : Provide a velvety texture. Use 5 to 20%.
- Barley flakes : Improve foam stability.
- Wheat flakes : Add body and whiteness.
- Corn / rice flakes : Lighten body and color.
Building a coherent recipe
- Define the style : Color, strength, bitterness, aromas.
- Choose an appropriate base malt : Pils for pale beers, Pale for IPAs, Munich for malt‑forward beers.
- Select hops : A duo often suffices (bittering + aromatic).
- Match the yeast : It must fit the style.
- Think balance : Malt vs hops, alcohol vs body, aroma vs finish.
Water Treatment in Brewing : The Invisible Ingredient That Changes Everything
When talking about beer, people often think of malt, hops, yeast... but rarely water. Yet, it accounts for more than 90% of the final product. And if you want to go from a "good homebrew" to a "pro-worthy batch," it's time to look at its mineral profile.
Why treat brewing water ?
Water influences :
The flavor (via ions like sulfate or chloride)
The fermentation (thanks to calcium and magnesium)
The texture (via sodium and chloride)
The pH, which impacts enzymatic activity during mashing
In short : well-treated water allows for better sugar extraction, a healthier fermentation, and a more balanced beer.
Key parameters to monitor :
1. pH
Ideal range : 5.2 to 5.6 during mashing
Too high : astringency
Too low : poor sugar conversion
Tools : pH meter or online calculator
2. The 6 Brewer's Ions
Calcium : Stabilizes pH, aids fermentation (50-150ppm)
Magnesium : Nutrient for yeast (5-30ppm)
Sulfate : Accentuates bitterness and dryness (50-250ppm)
Chloride : Provides roundness and smoothness (50-200ppm)
Sodium : Flavor enhancer, texture (10-100ppm)
Bicarbonate : Influences pH, especially with dark malts (0-300ppm, depending on style)
How to adjust your water ?
1. Get your profile
Request a report from your municipality or water board
Use websites like LittleBock for local data
2. Correct the pH
Add lactic or phosphoric acid
Also acidify the sparge water (pH between 5.8 and 6.0)
3. Add brewing salts
Calcium chloride : calcium + chloride
Calcium sulfate (Gypsum): calcium + sulfate
Magnesium sulfate (Epsom salt) : magnesium + sulfate
Table salt : sodium + chloride
Baking soda : sodium + bicarbonate
Tip : Play with the sulfate/chloride ratio to modulate the flavor profile:
Ratio > 2 : dry and bitter beer (IPA, Saison)
Ratio < 0.5 : round and malty beer (Stout, NEIPA)
Bonus : boiling water to purify it
Boiling the water the day before brewing allows you to :
- Eliminate chlorine
- Precipitate carbonates
- Facilitate pH drop
The mineral profile, a reflection of regional styles
Historically, beer styles were born from local waters :
Pilsen (Czechia): very soft water → crisp and delicate Pilsner
Dublin (Ireland): hard water → dark and dry Stout
Conclusion : mastering water means mastering your beer
Water treatment might seem technical, but it is an exciting and rewarding step. By adjusting a few parameters, you radically transform the final result. And as the brewing adage goes: "Good water makes good beer... provided you know how to tame it."
You want to think bigger ?
Brew like a pro
Expert level
What is pressurized fermentation ?
Pressurized fermentation involves letting yeast work in a closed environment where pressure is regulated using a spunding valve. This method, originating from the industrial world, is now accessible to homebrewers thanks to simple and affordable equipment.
Key benefits
- Faster fermentation : Brew lagers in under 3 weeks, even at room temperature.
- Reduces fermentation time for ales and IPAs while maintaining a clean flavor profile.
- Cleaner beer
- Less production of esters, diacetate, and fusel alcohols.
- Fewer off-flavors (wet cardboard, butter, sulfur...).
- Reduced risk of oxidation due to the absence of contact with oxygen.
- Fewer transfers, better hygiene
- Fewer manipulations = lower risk of contamination.
- Ability to carbonate directly during fermentation, simplifying bottling or serving.
Why it works
Pressure alters yeast metabolism : they produce fewer unwanted aromas while continuing to transform sugars into alcohol and CO₂. The generated CO₂ creates an acidic and oxygen-free environment, which inhibits ester production and protects aromas.
Required equipment :
- Pressurizable fermenter : To contain beer under pressure (e.g., Fermzilla)
- Spunding valve : To regulate internal pressure
- Temperature controller : To keep the yeast within its optimal range
- CO2 tank (optional) : For serving or forced carbonation
Rolling Beers offers complete kits for pressurized fermentation, suited for all volumes and budgets.
For which type of beer ?
- Lagers : warmer, faster fermentation, without compromising on cleanliness.
- IPAs / Pale Ales : hop aromas better preserved, more stable beer.
- Experimental beers : opportunity to brew more often and test new recipes.
In short
Pressurized fermentation means :
- A fast, clean, and efficient method
- A way to brew like a pro, right at home
- An accessible technique thanks to Rolling Beers kits
Counter-pressure kegging : The step-by-step guide
Counter-pressure kegging is an ideal method to transfer your beer from the fermenter to a keg while minimizing oxidation and loss of carbonation. Here is how to proceed efficiently, step by step.
Prerequisites
Fermented beer : the process can only begin once fermentation is complete.
Already carbonated beer (ideally) : even though carbonation can be done in the keg, it is preferable for it to already be present.
Step 1 : Keg cleaning
Start by thoroughly cleaning your keg with your usual cleaner. A clean keg is essential to prevent any contamination.
Step 2 : Transfer line cleaning
Connect the beer line to the keg's liquid Ball Lock post.
Connect the CO₂ to the keg's gas post.
Apply slight pressure to circulate the cleaner through the line (often a John Guest 3/8 or 5/16 tube depending on your setup).
Step 3 : Rinsing and purging
Rinse the keg and line with clear water by repeating the process from Step 2.
Inject CO₂ to dry and purge the keg and line.
Once the water is evacuated, disconnect the line and pressurize the keg (between 8 and 12 PSI), matching the fermenter's residual pressure.
Step 4 : Checking fermenter pressure
Check the fermenter's residual pressure, usually between 8 and 12 PSI.
Step 5 : Installing the spunding valve
Place a spunding valve on the keg's gas post. It will regulate the pressure during the transfer.
Step 6 : Connecting CO₂ to the fermenter
Connect your CO₂ tank to the fermenter to be able to push the beer into the keg.
Step 7 : Connecting the beer lines
Connect the fermenter's beer line to the keg's beer line. The circuit is ready for transfer.
Step 8 : Starting the transfer
Set the CO₂ pressure slightly above the fermenter's pressure (e.g., if the fermenter is at 10 PSI, set it to 15 PSI).
Since the keg is already pressurized, the transfer happens via counter-pressure, limiting turbulence and oxidation.
Step 9 : Monitoring the spunding valve
While filling, keep an eye on the spunding valve. Adjust the knob if the pressure rises too much to maintain a stable flow.
Step 10 : Determining the filling level
Three possible methods :
Visual : If you are using an Oxebar, you can see the level directly.
Weighing : 1 L of beer = 1 kg. Place the keg on a scale and stop the transfer once the target weight is reached.
Flow Stopper : Replace the spunding valve with an accessory like the Duotight Flow Stopper. An internal ball is pushed up by foam when the keg is full.
Step 11 : End of transfer
Disconnect the beer line from the keg.
Turn off the gas supply.
Disconnect the line from the fermenter.
With this method, you get a beer well protected from oxygen, ready to be served or stored.
Three levers to gain consistency and quality
Once you already master all‑grain brewing, the next step is to optimize your process. Three areas truly make a difference: thermal stability, precise gravity monitoring, and reducing oxidation. These adjustments turn a good batch into a controlled and reproducible one.
Isothermal control: stability above all
- Maintain a constant temperature : A stable mash guarantees a consistent enzymatic profile.
- Avoid fluctuations : Variations of 2–3°C change fermentable sugar production.
- Insulated BIAB or automatic kettle : Regularity matters more than technology.
- Direct impact : More predictable body, alcohol level, and texture.
Connected gravity: precision and real‑time control
- Bluetooth/Wi‑Fi sensors : Tilt, iSpindel… monitor fermentation without opening the fermenter.
- Fermentation curve : Detects slowdowns, fermentation end, or yeast issues.
- Fewer manipulations : Reduces oxidation and contamination risks.
- Advanced benefits : Adjust cold crash, plan bottling, compare batches.
Anti‑oxidation: protecting aroma and color
- Limit transfers : Every movement exposes beer to oxygen.
- Fill gently : Avoids turbulence and preserves aromas.
- Purge with CO₂ : Ideal for IPA, NEIPA, or heavily hopped beers.
- Avoid hot‑side oxidation : Stirring during cooling increases risks.
- Use Stop Redox : This antioxidant blend protects beer from the mash onward, stabilizes color, and preserves aromas. (see product)
Lager : Temperature control, the key to successful fermentation
Brewing a lager is a bit like playing a classical score : every note must be right, every tempo respected. And in this brewing symphony, temperature is the conductor. Unlike ales, lagers require a slow and cold fermentation, making thermal control absolutely essential.
Why is temperature so crucial for a lager ?
The yeasts used for lagers (such as Saccharomyces pastorianus) are so-called "bottom-fermenting" yeasts. They ideally work between 8°C and 12°C, well below ale temperatures. At this range, they produce fewer esters and fusel alcohols, giving the lager its clean, crisp, and refreshing profile.
But beware : poorly managed temperature can lead to off-flavors, incomplete fermentations, or contaminations. Here is why proper thermal control is indispensable.
The 5 benefits of precise temperature control :
1. Stability and consistency : Every batch becomes reproducible. By maintaining a constant temperature, you avoid flavor variations from one batch to the next. This is the secret of coherent and professional lagers.
2. Better flavor profile : Temperature too high? You risk unwanted fruity aromas. Too low ? Fermentation slows down or stops. By respecting the ideal range, you favor the subtle expression of malted and hopped aromas.
3. Lower risk of contamination : Yeast well established at the right temperature dominates the environment and limits microbial intrusions. Fermentation naturally produces alcohol, but temperature ensures the safety of the process.
4. Optimized fermentation : A stable temperature allows yeast to work efficiently from start to finish. At the end of fermentation, a slight rise (diacetyl rest at ~15°C) helps eliminate unwanted compounds like diacetyl.
5. Elimination of off-flavors : Defects like a buttery or sulfur taste are often linked to poor thermal management. By mastering temperature, you get a clean beer, free of aromatic parasites.
How to control temperature effectively ?
Here are some practical solutions for homebrewers :
- Inkbird ITC-308 : Programmable thermostat for fridge or chamber
- Heating mat/wrap : Maintaining temperature in winter
- Ferminator or RAPT : Compact and precise fermentation chamber
- Icemaster G20.1 : Glycol chiller for advanced control
These equipment pieces create a stable environment, essential for the long and cold fermentations of lagers.
And what about lagering ?
After primary fermentation, lagers benefit from a cold maturation phase called lagering. It takes place between 0°C and 4°C for several weeks. This process refines flavors, clarifies the beer, and eliminates the last unwanted compounds. Once again, temperature is king.
Conclusion : mastering the cold to brew excellence
Brewing a lager means embracing rigor. Temperature control is not a luxury, it is a necessity. It guarantees a clean fermentation, a stable beer, and an aromatic profile faithful to what enthusiasts expect from a good lager.
So, if you dream of a crisp pilsner or a smooth and malty helles, invest in thermal control. Your beer will thank you.
Our main brands
Our main brands
Rolling Beers offers a wide selection of leading brands specialized in beer brewing. While we have access to their full catalogs, not all products are listed on our website. If you’re looking for a specific part or ingredient, feel free to contact us via our support or by phone. Our customer service team is also available for advice, order tracking, or quotes.
Rolling Beers offers premium brewing brands.
Looking for a specific product ?
Contact our customer service team for any request or advice.
_2f8f1848.png)
_17f5ce8e.png)
_f8197bc.png)
_b2c71c0.png)
_7ac5ff.png)
_1_3240aaeb.png)
_70be1293.png)
_4e93b6b5.png)
_3d5348c8.png)
_1_d60c80d.png)
_207195eb.png)
_507c4bcc.png)
_1_16ca7ac5.png)
24/48h Shipping
Click&Collect
Customer Service
Secure Payments
24/48h Shipping
Because beer can’t wait, at Rolling Beers we ship your orders within 24–48 hours. Estimated delivery in 24–48 hours.
Click & Collect
Are you in the Montpellier area ? Skip the shipping fees and pick up your order directly from our warehouse.
Customer Service
The Rolling Beers team supports you from A to Z with all your requests and projects. Get in touch — we’ll be happy to help !
Secure Payments
At Rolling Beers, you can shop with confidence : all card payments and bank transfers are 100% secure.
Subscribe to our newsletter !
Subscribe to our newsletter !
Don’t miss a thing from the Rolling Beers adventure — join our newsletter and enjoy exclusive offers, early access to new products, and plenty of expert tips !
Don’t miss a thing from the Rolling Beers adventure — join our newsletter and enjoy exclusive offers, early access to new products, and plenty of expert tips !
By subscribing to our newsletter, you agree to receive promotional emails.
By subscribing to our newsletter, you agree to receive promotional emails.